Chevron Striped Dresser DIY


I visited this piece of furniture at Catholic Charities 'Turn Styles' Thrift Store a few times before I finally took it home with me. I knew it would be a serious undertaking breathing new life into it and being that I'm newish to the art of refinishing I was a little hesitant to commit. But finally, one day after some prompting from the other shoppers, I gathered the courage to take it home.
This thing had definitely been rid hard and put away wet (the veneer was chipped, it was badly faded and scuffed, and it had some major water damage) but it fit my basic criteria for 'project' furniture - good lines, good wood, good price.


As I'm wheeling this beast into the garage my husband tells me he'd really like to get some furniture that we could 'cherish' for the rest of our lives. Cherish, people - C H E R I S H. Obviously, the 'before' of this dresser is nothing to uh, 'cherish' - it must have been a hint to not screw it up, but hey, no pressure.
I felt the lines of this pieces begged for a modern treatment. I wanted to stay away from anything too colorful or cutesy - I'd seen some interesting ideas that featured the wood grain in the design and I wanted to make a run in that direction.

Sara Aschliman of DwellBeing.com

Sarah Dewey of Dewey Branch Designs, Pinterest

Rachel of TransientExpressions.com
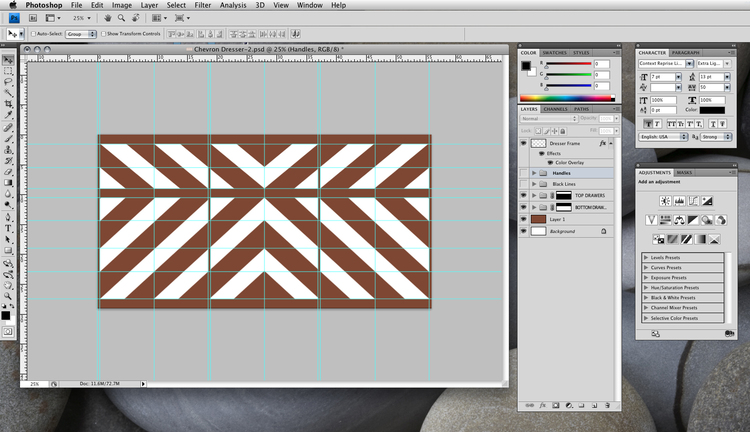
So, the first thing I did was gather all the dimensions of the dresser and create a scaled Photoshop document on which to create and modify a design. If digital drawing isn't your thing, you can always use graph paper as the grid for creating yours. I don't recommend free-handing anything this geometric - you've got to get mathematical with an undertaking this nat's ass tight. Amiright?
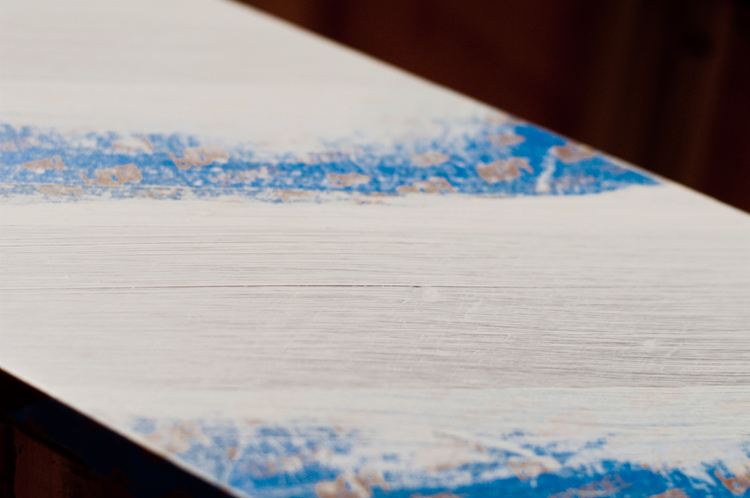
After polishing the idea for my design I readied the dresser for production by removing the pulls and patching the chipped veneer with liquid wood. I used an electric palm sander to remove the previous wood stain and revealed the bare grain underneath.


After thoroughly cleaning all the sanding dust from the dresser I applied two coats of oil based wood stain, lightly HAND sanding with fine grit paper after the first coat, and steel wool after the second.


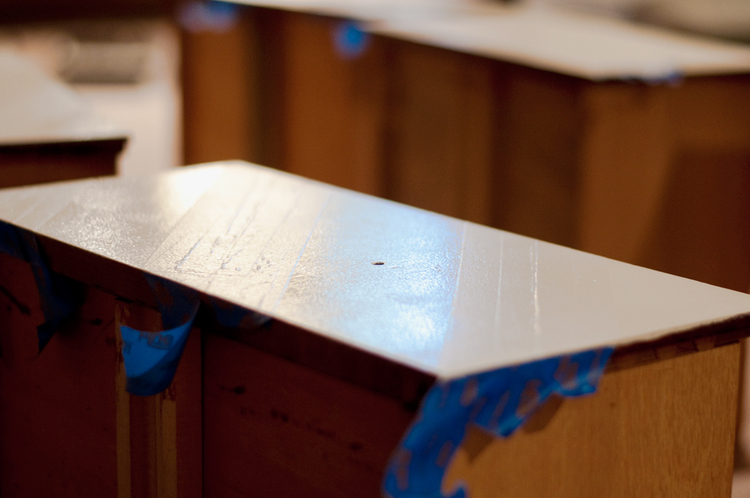
I let the stain set for about a week and then moved on to the chevron striping portion of the refinish. I applied blue painter's tape to the dresser drawers (while still in the dresser) using my Photoshop drawing as a guide. I then removed the drawers and applied three VERY thin coats of white paint, letting each layer dry completely before applying another.
Tip: The trick to not getting paint leaks under the tape is to 'burnish' it after applying by firmly rubbing your finger along the edges to heat it and activate the adhesive.


After carefully removing the tape, I followed up with a poly coating to protect the chevron pattern from chipping or peeling. I reattached all the pulls, put the drawers back in place...


...And VOILA! My Chevron Striped Dresser is complete, and if I do say so myself, BEA-U-TIFUL.

Here's the 'before & after' - It's a pretty dramatic transformation!

See it styled in my guest room HERE!